In Part I we deconstructed a sample photograph, and came to some conclusions about how it was made. In this part we’re going to reconstruct a similar photograph in the same style.

Firstly I’ll have to define my terms, I’m not planning to go out and buy myself exactly the same set of props; I’ll just use whatever I’ve got to hand in my house that’s similar. In particular: I’ll use the edge of my dining table, and a couple of small black bowls to begin. The relevant ambient light in the room is supplied by uplighter and a table lamp – although we’ll very quickly be drowning them out with a flash.
I’ve begun by putting the camera on a tripod, set fairly high and looking down. I’ve plugged in a remote shutter release so that unnecessary and unwanted movement of the camera are avoided.
First thing I did was get a white-balance reading. Again, because we’re going to get rid of the ambient, this step isn’t very important. I’ve simply taken a photograph of my grey card and set the camera to “custom†white balance. The room is relatively dim, so these are long (approx: three seconds) exposures.
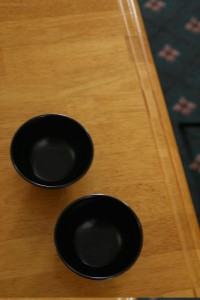
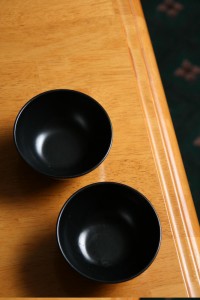
Now we begin for real; I’ve placed a bare flash on a stand, remote triggered at camera right, at about the same vertical height as the table. I’ve not made any huge effort to set the flash power to something sensible, and I’ve kept the same exposure from the previous ambient photograph. The table surface is completely overexposed and hence blown out. We can see the hard edges of the shadow which we expect from a bare flash (which is effectively a point source). Notice also (although it’s not going to matter) that the shadow cast by the bowls is not black, we’re seeing through to the table and it’s ambient coloured – this is important to understand about shadows, the shadow is not a thing, it is the absence of a thing. It is the absence of a strong light source, here leaving “no-flash†not “no-lightâ€. We’re going to get rid of that ambient light by increasing the shutter speed from three seconds to one two hundredth of a second – remember, shutter speed has absolutely no effect on flash exposure. In other words, the shadows will get darker, as the ambient will not register any more.
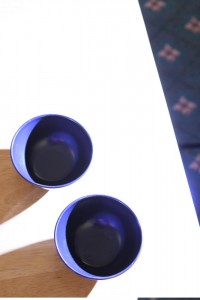
Notice as well that the light in the bowls has a blue tinge. That’s because the camera is still set to balance for the ambient, not the flash, which is blue relative to the ambient light. We’re about to ditch the ambient light, so we’ll switch back to daylight white balance.
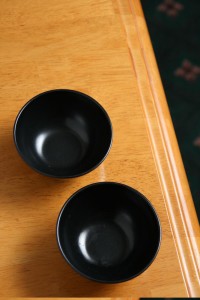
Now, comparing with our target image, the shadows are very long. That tells us that the flash is far too low. In this next photograph I’ve extended the flash stand and angled the flash downward (forgive the big black area in the corner, the camera strap crept into this image).
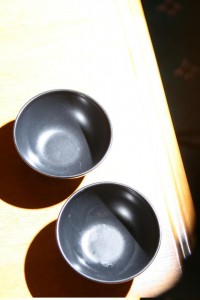
It might not look it, but this is much closer to the original. Look at the shadow direction and length. Notice also how dark the carpet has become compared to the ambient photographs, that’s because our only spill light from our directional flash is lighting the carpet now.
Now that we have the broad light position and direction right, our next step is to start refining the quality of the light. Those hard edged shadows won’t do; we want them softened. We need to make our light source bigger.
The shadows have been considerably softened, there is no hard edge any more. The flash power wasn’t reduced for this photograph, but the light falling on this scene has reduced considerably. The flash has been fired into a shoot-through umbrella, which makes the light source much bigger; but putting material between flash and scene eats a good chunk of our source light – easily a couple of stops in this case. Fortunately, in this situation it’s merely reduced it into an acceptable range, and not made us short of light. If it had, we would have had to either open our aperture more, increase our ISO, or raise the flash power.
We’re moving closer to our target image, but we’ve still got problems. The shadows are very dark, almost black. The table is invisible in the shadow areas; not like in our target image, where the bowl shadows are subtle.
Shadows brightened. How did I do that though? Go back to our original analysis; we decided that the key light was an active source, but that the fill light was some form of reflector. So I’ve added a reflector – some white material, just out of shot on camera left. That’s enough to reflect some of the key light that was simply leaving the scene, back into the scene and bring those dark shadows out of the blacks. This is good enough to start adding some of the other elements into the scene.
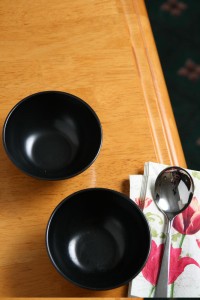

With our lighting already well set, we focus here on composition. I’ve not tried very hard here, and I was too lazy to slice some bread.
One thing to note is that while the carpet in the background is much darker than the lit foreground, the lighter patterning on it is picking up the spill light from the umbrella (and probably some reflected off the ceiling). We could fix that in post, but it’s just as easy (and less work) to fix it in camera by putting something dark on the floor (I used the black side of a reflector).
This is an opportunity to look at the reflections in the spoon. Not exactly the same as the original (which I think was using much bigger and brighter studio lights and reflectors), but you can see the same features we saw in the original reflected in this spoon: a bright light on the left of the spoon, reflecting the key light on the right; and a fill reflector reflected on the right of the spoon. This also confirms to us that it’s a reflector, camera left, in the original rather than a reflection of the white bowls – the bowls are vanishingly small in their reflection in the spoon, therefore the large white area we see must be a large reflector.
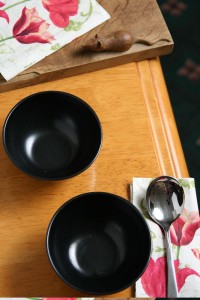
We’re nearly done now, time to add the final element: the soup. I made a lovely butternut squash soup and filled the bowls (or perhaps I’m lazy and just used orange juice).
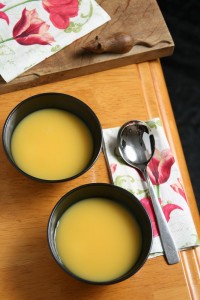
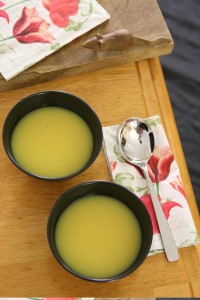
For comparison I’ve also included a shot of exactly the same scene but with the flash turned off and the shutter speed lowered right down to make ambient bright and visible. You should be able to clearly see the benefits of using off-camera flashes above ambient light – the shape and texture of all the materials in the scene are so much clearer in the off-camera flash image, and contrast is increased which makes things less washed out – notice the complete lack of any shadows in the ambient-only image.
Not a bad photograph, and not a bad reproduction. There is one key feature we’re missing: shallow depth of field. I have to admit defeat on that one – none of my lenses are expensive enough to allow a wide enough aperture with a simultaneously small enough focal length to achieve a shallow depth of field here, while maintaining this composition. If I were to guess, I would say the original is an f/2.8 85mm lens, and the photographer stood on a ladder to take their photograph.
If you were really enamoured of the photograph, you can purchase it for bitcoins over on CoinDL.